.
Hey everyone! GFC will be discontinued soon for Wordpress Blogs, so be sure to follow with LinkyFollowers instead! I don't want to lose any of you! Thanks!! :D
Showing posts with label Guest Post. Show all posts

Etched Glass Coasters - {Tutorial}

Hey there!
My name is Melysa and I am just thrilled to be sharing this guest post with 
Courtney and the Between U & Me readers!

A little bit about me; I am a wife, successful career woman, and 
(most importantly) a mom to a handsome, almost 5 year old little man. 
Boy how time flies.  I have a little blog called 
where I share crafts, recipes, helpful tips and decor ideas.
I hope you like this post and come over to visit!

One of my favorite hobbies is working with glass in all forms; 
stained glass, fused glass, mosaics, etc.

Today I am sharing a tutorial on etched glass drink coasters.


Below is how I make my own tiles, but you can also purchase 
clear glass 4 inch square tiles at any of the large
home improvement stores.

I start with a large sheet of glass.

I cut it into 4 inch strips, and then cut again to make a 4X4 inch square.
I am cutting 4 tiles for a set of coasters.


Here is my cut square.  You can see the sharp edges.


I pop the squares into my glass kiln for 4 hours to
polish the edges smooth.
The blue you see below is called kiln wash, it prevents the glass 
sticking to the kiln.

Beautiful Safety Pin Bracelet - {Tutorial}

I'm so excited to be here guest posting today.  Just a little introduction, I'm Kimberly from The Brown Eyes Have It.  I'm trying to be the best wife and mother I can be and having a little fun along the way and I blog about all that includes.  Also today is my birthday! Yeah!!  So as I was thinking of what I could post about, what the date was, realizing my littlest three need a birthday present for me, and I wanted a new watch, so that's what we're doing today - an easy safety pin watch or bracelet.


Supplies:
Safety pins - around 60 for a watch, around 70 for a bracelet
Stretchy cord - 2 pieces about 20" each - I used 1 mm thickness, you can use thinner, but the thicker
     it is the stronger it is
Seed beads - picture shows two tubes, but I only needed one
Watch face - I forgot that in the picture, oops.  A face with bars or holes in edge of the face is fine. If
      you use a face with holes, make sure your cord is small enough to fit through the holes.
Clear nail polish or super glue


Open the pins and start loading the beads on.  If you want a random pattern, the easiest thing to do is dump the beads in a bowl and just start scooping the pin through.  Or, you can painstakingly pick out each bead and slide it on the pin in precise color order, the choice is yours. :)
After you've loaded all the beads onto the pins, start stringing the pins on one of the pieces of string.  String them head up, head down, head up, etc.  It makes them lay them nicer.  Also make sure they're all laying the same way, either the clasp (beaded) side all up or the blank side up, just make sure they're the same.  Really, take a look through them and make sure they're all the same, not that I had any experience with this. :)  Lucky for me, my upside down one was towards the end.


After you've got them all strung on one string, string the other cord through.

Oreo Cupcakes

Hi, Between U & Me Readers!
I am so excited to be a guest poster today!!!
My name is Chrissy and my blog is The Taylor House. I love to share recipes, crafts, crochet, decorating and organizing.
I have two little boys that keep me very busy
as well as my hubby of 15 years. :)
Today I am excited to share this recipe with you for some yummy Oreo Cupcakes, I had originally found this recipe on Pinterest  when I was looking at all types of Oreo recipes and decided to give it a shot. 
They taste like cookies and cream, so yummy!!
 

Preheat over to 350F. Line 24 cupcake tins with paper liners.
Twist apart 24 Oreos. Place the cookie with filling on it, filling side up, in the bottom of each cupcake pan. Cut 12 of the filling-less cookies in half for garnish, and crush the others in a plastic bag with a rolling pin to make fine crumbs.
Reserve these crumbs to mix into the frosting.
Cream the butter in the bowl of a stand mixer until light and fluffy. Beat in the milk and vanilla.
Roughly chop the remaining Oreos and toss with 2 tbsp flour.
Sift the flour, baking powder, and salt together into the butter mixture. Stir a few times, then mix in the sugar and beat with the mixer on low for about 30 seconds. Add the egg whites. Turn the speed up to 24px and beat for two minutes. Fold in the roughly chopped cookies

Color Trends of Flowers in 2012

Flowers add a touch of romance, color, or beauty to any room, along with a variety of fragrances. However, like fashion and home décor, flowers tend to follow trends, especially when it comes to choices. Fortunately, with nature providing an abundance of varying colors and shades, sticking with the color trends of 2012 shouldn’t be too difficult.


Soothing nature

One of the dominant color schemes this year is the soft, calming colors of the beach. Expect to see many pale sandy yellows, rich olives, and warm aquas.  
Because this color scheme is so earthy, vibrantly colored flowers will disrupt the flow of ambience. It’s because of this that shades of green flowers, broken up by soft whites or yellows, work wonderfully well.
Examples include green chrysanthemums, and vibernum, together with creamy white flowers such as freesia or even carnations. Yellows should be more muted than vibrant, so winter jasmine or forsythia work wonders. Silver dollar eucalyptus, although more foliage than floral, add a fragrant splash of brighter green.


Fresh and Pretty

Another popular color scheme dominating homes this year is reminiscent of sherbets and sugar. Mixing minty greens with peaches, and sherbet pinks and purples, this color palette is made more vibrant with splashes of bright aquamarines.
Floral colors, therefore, can take on any number of these shades to enhance or complement. - Lilacs - There is no end of lilac flowers, ranging from the softest, lightest shades, to deeper, more vibrant hues. Any of these shades will work with this fresh palette either alone or mixed with other colors. 
 
 - Sherbet orange – One particular flower that works wonderfully with this color scheme is a rhododendron called Apricot Sherbet. The flowers are quite 24px and ruffled, and each flower consists of varying pinky-orange shades. In a room that may consist mainly of cooler blues, this shade of orange can add a much-needed dash of warming sunshine.
- Pinks – choose soft yet sweet pinks such as roses, phlox, or snapdragons. Pinks work amazingly well with this color scheme because of their simplicity. They can liven up darker hues, or enhance the soothing calm of more pastel shades.
Aquas – an alternative option for this color scheme would be to add a splash of aqua simply with flowers themselves. Although there aren’t many bright aqua colored flowers in nature, the aqua Gerber daisy is one that is vibrant enough on its own to achieve this.


Earthy tones

The third color scheme that is sure to be incredibly popular this year consists of more neutral, earthy tones. Palettes featuring deep, earthy browns, warm, mineral grays, and pale chalky hues are sharing spaces with small pops of bright hues inspired by nature. To tie in with this color scheme, flowers can range from matching browns and grays, to more vibrant golds and rusty reds, or stand out bright oranges. When using darker flowers however, it’s always more complimentary to mix with a softly contrasting lighter choice.
- Browns and chocolates – you may be surprised to know that there are many naturally occurring dark brown flowers, most of which have ‘chocolate’ somewhere in their name. Chocolate cosmos are a deep, rich brown reminiscent of plain cocoa, while chocolate sunflowers are warmer, with petals lightening towards the tips. Similarly, button poms have a slightly orange-colored tint to them. For a splash of color, Cymbidium orchids are primarily a soft, creamy yellow, with dark chocolate centers, making them an ideal single choice.
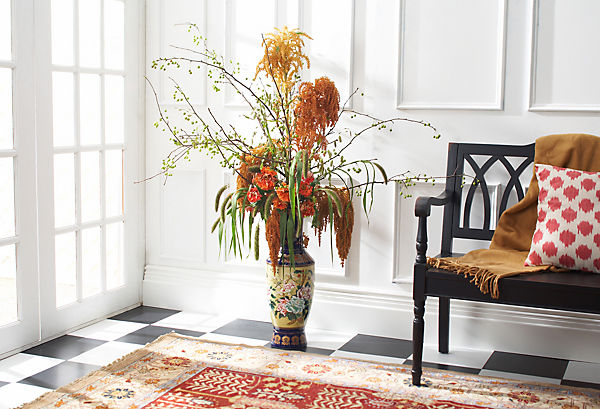
- Golds and bronzes – Amaranthus and chrysanthemums both come are beautiful shades of gold, while Camel roses are a paler bronze.  
- Reds – although reds work beautifully well with this palette, they should be more rusty-colored rather than true reds. Gloriosas come in an amazing shade that will provide a pop of color to this scheme, or try a variety of Helenium known as ‘dancing flames’ for a vibrant, pretty addition.


Shading for someone else

If you are sending flowers to someone else, try to consider their color scheme. A bouquet, for example, that compliments someone’s home, is going to be placed where they can be admired and enjoyed. Because of this, it’s most definitely worthwhile knowing someone’s choice of colors before you get flowers for them.


About the Author

Patricia Hall works part-time for a florist and flower delivery but loves to surround herself with flowers at any given point of time. Even in her free time she loves to involve herself with everything flora and fauna. 'To me there is nothing more beautiful and global as the language of flowers - it is the easiest to understand all around the world in the same way. That is one reason why I truly admire flowers for what they represent in some ways - unity of all mankind!'

Vintage Inspired Apron - {Tutorial}

Hello, all! I’m Ann – the founder and editor-in-chief of Suburban Prairie Homemaker.  I'm so thankful to Courtney, who is such a generous, kind and wonderful hostess, for the opportunity to be here with you today, and to share with you a lovely, vintage-inspired project.

For those of you who haven’t visited my blog, let me tell you a little about myself.  I am a Christian wife to my soul mate, and a stay-at-home mom who homeschools our two children.  I also love anything I can do to keep my hands busy:  knitting, crocheting, sewing, quilting, gardening, canning, painting (especially faux painting), DIY, repurposing and upcycling, paper crafting, digital scrapbooking, card making, cooking and baking, and anything else I can do to get myself into trouble.  SPH is a way to share my creativity with others, especially those who are new to various skills, or aren't that confident with the skills they have.  I know for a fact that what I do isn't rocket science, and I'm out to prove it to the world!  When you visit the Suburban Prairie Home, you'll find craft projects to make for your friends, loved ones, and even charity.  You'll also find delicious gluten-free recipes, and tips to save you time and money in the kitchen.  Anything and everything about the adventures of homemaking - and some days are more adventurous than others!

One of our regular features is One Yard Wednesday.  It's a chance for those who are new to sewing to learn some new skills, and for all of us to repurpose materials we may have on hand or use up scraps in our stashes.  If we do need to buy a piece of fabric for a project, no one's wallet will take a major hit, and the projects generally are small enough to do in an evening or weekend afternoon, so no one's time is tied up for too long, either.

Here is the project for our wonderful One Yard Wednesday this week – a lovely vintage inspired apron – perfect for St. Valentine’s Day.  We will be repurposing a pillowcase and using about a yard of gingham.  Feel free to mix and match fabrics as you choose, to either coordinate or match your pillowcase, or what's available in your stash.  No pillowcase?  You can find out how to make one here, and use your stash or other repurposed fabric to make one.


So what are we making with these?  Well...

 I found this vintage apron:


 in this awesome book.

As soon as I saw it, I knew I had to try to make that apron for myself.  So just like all my other projects, I had to mentally pull apart the pieces to decide what made this apron so special.  Well, of course, the obvious attraction is that cross-stitching, which I'm sure was done by hand.  What a great way to accent that beautiful green gingham!  And I also liked how it was fitted, like a pencil skirt, instead of either just flat across the waist or gathered.  That makes it seem so classy and elegant, instead of so "everyday" - don't you think?!

So let's get started...

In addition to the pillowcase and gingham fabric, you will need thread that matches your pillowcase (mine was white), and thread that coordinates with your gingham or contrasting/coordinating fabric (mine was red).  You will also need a rotary cutter, ruler and mat, and a sewing machine, and you need to know how to use them (and safely!).  Have your iron and ironing board handy, too.  Oh, and pins would be pretty useful.  Well, actually necessary...

Remove the sewn end of your pillowcase.

And remove the hem.


Save the hem pieces for later - you'll see why in a little bit.

Next, we're going to trim it to a size that will fit across the front of your body and about halfway around the sides.  Like to where the seams are for your jeans.  I wanted the apron to cover the front of me, from just below my natural waist (because we'll be using a good-sized waistband), to just above my knee, leaving room for a nice-sized gingham hem.  Also, because my pillowcase was a pretty sheer white, I wanted it to be doubled.  This would give the apron a stability boost, too.  For me, this measurement was 33" by 25 1/2".  If you need to change measurements to fit you, feel free.  It's an apron.  This is good practice for newer sewists.  You may want to ask a friend or neighbor to help you meaure, or if you have to do it by yourself, lay your favorite pair of pants on the floor and measure on them.  Remember, our end product is going to be straight and fitted like the front part of a pencil skirt.  And it's an apron.  An extra half inch (or short a half inch) is not the end of the world.  Running out of chocolate is.

Slow Cooker Spicy Peanut Butter Chicken

Hi everyone!
I'm Rachel from My Happily Ever After and I'm so stoked to be guest posting at Between U & Me today!
I'm a wife of two years and a puppy mama who loves to craft and take photos,
Play on Pinterest {find me at rachelmh}
And work on new fun items for my Etsy shop!

But more than anything, I love to cook simple, delicious, make-before-work recipes in my slow cooker
{I have a whole series of slow cooker recipes that you can find here}
So today I'm going to share a totally delish recipe for Slow Cooker Spicy Peanut Butter Chicken


*Slow Cooker Scrumptiousness* 
Spicy Peanut Butter Chicken

Ingredients 
2-4 chicken breasts
1 cup creamy peanut butter
1 can of salsa
2 1/2 tblspn soy sauce
2 tblspn honey
1/2 cup orange juice
1 tsp red pepper flakes
1 1/2 tblspn ginger
1 tsp curry powder
Chopped green onions for garnish

This could be really good if you added some veggies in there too if you want to make it a little more healthy.

Pour a bit of salsa on the bottom of the pot to cover.


Add the chicken breasts on top.
{I did this with two chicken breasts because it was just for Hubs...there was a ton of extra sauce left over so I think that you could probably use the same amount of ingredients with up to four chicken breasts}


Add the rest of the salsa, peanut butter, soy sauce, honey and orange juice.


Top with ginger, curry powder, red pepper and salt.


Mix everything up and turn your crock pot on low.
Let it cook for 6 - 8 hours.

Dollar Store Favor Box Makeover - {Tutorial}

Hey everyone! Today, I have a guest post by The Rebel Crafter to share with you! This is such a unique and fun idea for any girly occasion! Enjoy!
--------
Happy new Year Rebel Crafters! I hope you all enjoyed your Holidays!
If you have a wedding shower, birthday, or bachelorette party coming up then this party favor makeover is a fun and inexpensive project. When I was at the dollar store I noticed a package of wedding dress party favor boxes. 10 for a dollar, what a deal! Good design is all around us, but sometimes the execution is not the greatest. In this case the dress boxes are pretty washed out, but again at 10 cents a piece I knew they had great potential. I took the package home and worked out how to easily make them over into fun, and eye catching party favors. All you need is scrapbook paper, some embellishments, and a spool of inexpensive pliable wire to make the mini hangers. This project is very similar to paper dolls, you get to "dress up" your boxes. Once made they could hold chocolates, almonds, mints, M&M's, little nail polish or a small gift. The dress theme possibilities are endless just by changing the paper style. Add tulle to the front of the dress and it could be a little girls princess dress. Use leopard print and hot pink for a bachelorette party, or shower. I made my boxes in a variety of papers so you could see how different they can look depending on the paper choice. They are fun, and easy to make. My 8 year old Daughter made a bunch!
You will need:
Wedding dress Favor Boxes (I found mine at the Dollar Tree store. They come 10 boxes for $1). I have the link to Dollar Tree at the bottom of the page but they also include the groom boxes online. 
Scrapbook Paper
Spool of pliable inexpensive wire (I used what I had on hand so I am not sure of guage. Just look at the inexpensive wire in the jewelry section at the craft stores and find one that is thick enough to make a small hanger)
Embellishments of Your Choice (I used bling on a roll for the gem sashes, and ribbon flowers).
Taper Runner and Glue Dots
Thin ribbon to tie the box together (optional) you can use the sheer white ribbon that comes with the boxes. 
Scissors 
Wire Snip (optional, you can use scissors)
ColorBox Chalk Inkpad (optional) if you want to distress your box edges.

Oreo Eclair

Hey everyone! My name is Amber from over at The Pless Press.  I am a newlywed who is just trying to find her way through cooking, crafting, and becoming the best wife I can be. My husband's name is Corey, but you will notice in this post and throughout my blog I just refer to him as "C". I would love to have you if you ever want to stop on by and check us out!
I am so grateful for the opportunity to be here today. I love reading this blog and getting some new fresh ideas, so I hope today I offer all of you lovely readers one!
C and I are both the type of people who love to entertain. We love having our friends over for game nights, movie nights, etc. It helps that most of our closest friends are still around the Oklahoma City area, where we all attended college together. For this go around, we decided to try out a new dessert with them. It was a big hit! Let me tell you a secret, this is seriously one of the easiest desserts to make! For all of you people out there thinking you never succeed at cooking, well this is for you! Without further adieu, the Oreo Eclair Recipe!
Ingredients:
-1 24px Tub of Cool Whip
-2 24px Packages of Instant Vanilla Pudding
-3 Cups of Milk
-1 Package of Oreos
Directions:
 1. Mix together Cool Whip, pudding, and milk until creamy.
 2. Crush up 2 rows of the Oreos. If you have one of these bad boys, then you life will be so much easier. If you do not, do not fret. You can just use whatever method you prefer to get them all crushed up. 

Jelly Toast Coasters - {Tutorial}

Oh I am so excited to be here today! I have a cool project that I am tickled to share with you!

My name is Janel and I blog over at Hating Martha. I believe in fun, imperfection, craziness, and joy! My blog is full of crafts, decorating, recipes, nonsense, and more. Nothing too serious, nothing professional, everything exactly perfect! I would love for you to hop over sometime to share in some smiles and giggles! Okay, enough about me. It's time to get on with the craft. I am practical. I am quirky. And I love when the two come together in a craft! Like this...

Woot woot! Aren't these too fun!
Simple, inexpensive, and easy! Here's the how-to...
You are going to use a square of cork. (You know, the kind that come in packs of 4)
Print out the piece of bread coloring page at abcteach.com found here.
Then cut it out... This is your template. Unless you are a great free-form bread drawer. Then go for it!!
Trace around that template in each of the 4 corners.  

Custom Family Subway Art - {Tutorial}

Hi everyone, I am so excited to be guest posting (my very first) here at Between U & Me.  A big Thank You to the lovely Courtney for allowing me to crash here today.

I am Kristel, from the Velvet Door, and I have been blogging for just a few months. I started this blog mainly for a way for my family and friends back home to see my house and what I have been up to in trying to decorate it.  I have also realized that it will be a good archive for me to look back and see all the changes I have made to our home.  

Today I will be showing you this subway art that I was able to make.


I have been playing around with this empty wall in my family room, trying to figure out what I can fill it up with.  For a few weeks now, I have been wanting to create a subway art picture, they are everywhere lately, and I love seeing all those city names on them.  I happened to have on hand some leftover MDF from a previous project, just lying in the garage. I had to do some very minor cuttings, to fit all the pieces to make the frame.  Once those where cut, all I used was wood glue to glue them all together.


The back part was really curved, so I had to put paint cans on top to lay it flat, once the wood glue dried, it couldn't curve anymore.

I then used wood putty to cover all the exposed edges.  Once that dried, I painted the inside with two coats of Annie Sloan old white chalk paint.  Then, the fun part begun:


I used my Silhouette to cut out vinyl letters and then drew a line into the board, and placed the vinyl there.


After that was done, I painted the whole thing, even the frame, in black satin paint, with two coats.  Once dried, I removed the vinyl, and was left over with a black frame, and white words, which I sanded to make it look a little aged.  I applied a clear wax at the end to protect it from sticky dirty fingers which I'm sure will be touching this.  And here is the final product: