.
Hey everyone! GFC will be discontinued soon for Wordpress Blogs, so be sure to follow with LinkyFollowers instead! I don't want to lose any of you! Thanks!! :D
Showing posts with label Party Ideas. Show all posts

Oreo Cupcakes

Hi, Between U & Me Readers!
I am so excited to be a guest poster today!!!
My name is Chrissy and my blog is The Taylor House. I love to share recipes, crafts, crochet, decorating and organizing.
I have two little boys that keep me very busy
as well as my hubby of 15 years. :)
Today I am excited to share this recipe with you for some yummy Oreo Cupcakes, I had originally found this recipe on Pinterest  when I was looking at all types of Oreo recipes and decided to give it a shot. 
They taste like cookies and cream, so yummy!!
 

Preheat over to 350F. Line 24 cupcake tins with paper liners.
Twist apart 24 Oreos. Place the cookie with filling on it, filling side up, in the bottom of each cupcake pan. Cut 12 of the filling-less cookies in half for garnish, and crush the others in a plastic bag with a rolling pin to make fine crumbs.
Reserve these crumbs to mix into the frosting.
Cream the butter in the bowl of a stand mixer until light and fluffy. Beat in the milk and vanilla.
Roughly chop the remaining Oreos and toss with 2 tbsp flour.
Sift the flour, baking powder, and salt together into the butter mixture. Stir a few times, then mix in the sugar and beat with the mixer on low for about 30 seconds. Add the egg whites. Turn the speed up to 24px and beat for two minutes. Fold in the roughly chopped cookies

Dollar Store Favor Box Makeover - {Tutorial}

Hey everyone! Today, I have a guest post by The Rebel Crafter to share with you! This is such a unique and fun idea for any girly occasion! Enjoy!
--------
Happy new Year Rebel Crafters! I hope you all enjoyed your Holidays!
If you have a wedding shower, birthday, or bachelorette party coming up then this party favor makeover is a fun and inexpensive project. When I was at the dollar store I noticed a package of wedding dress party favor boxes. 10 for a dollar, what a deal! Good design is all around us, but sometimes the execution is not the greatest. In this case the dress boxes are pretty washed out, but again at 10 cents a piece I knew they had great potential. I took the package home and worked out how to easily make them over into fun, and eye catching party favors. All you need is scrapbook paper, some embellishments, and a spool of inexpensive pliable wire to make the mini hangers. This project is very similar to paper dolls, you get to "dress up" your boxes. Once made they could hold chocolates, almonds, mints, M&M's, little nail polish or a small gift. The dress theme possibilities are endless just by changing the paper style. Add tulle to the front of the dress and it could be a little girls princess dress. Use leopard print and hot pink for a bachelorette party, or shower. I made my boxes in a variety of papers so you could see how different they can look depending on the paper choice. They are fun, and easy to make. My 8 year old Daughter made a bunch!
You will need:
Wedding dress Favor Boxes (I found mine at the Dollar Tree store. They come 10 boxes for $1). I have the link to Dollar Tree at the bottom of the page but they also include the groom boxes online. 
Scrapbook Paper
Spool of pliable inexpensive wire (I used what I had on hand so I am not sure of guage. Just look at the inexpensive wire in the jewelry section at the craft stores and find one that is thick enough to make a small hanger)
Embellishments of Your Choice (I used bling on a roll for the gem sashes, and ribbon flowers).
Taper Runner and Glue Dots
Thin ribbon to tie the box together (optional) you can use the sheer white ribbon that comes with the boxes. 
Scissors 
Wire Snip (optional, you can use scissors)
ColorBox Chalk Inkpad (optional) if you want to distress your box edges.

Oreo Eclair

Hey everyone! My name is Amber from over at The Pless Press.  I am a newlywed who is just trying to find her way through cooking, crafting, and becoming the best wife I can be. My husband's name is Corey, but you will notice in this post and throughout my blog I just refer to him as "C". I would love to have you if you ever want to stop on by and check us out!
I am so grateful for the opportunity to be here today. I love reading this blog and getting some new fresh ideas, so I hope today I offer all of you lovely readers one!
C and I are both the type of people who love to entertain. We love having our friends over for game nights, movie nights, etc. It helps that most of our closest friends are still around the Oklahoma City area, where we all attended college together. For this go around, we decided to try out a new dessert with them. It was a big hit! Let me tell you a secret, this is seriously one of the easiest desserts to make! For all of you people out there thinking you never succeed at cooking, well this is for you! Without further adieu, the Oreo Eclair Recipe!
Ingredients:
-1 24px Tub of Cool Whip
-2 24px Packages of Instant Vanilla Pudding
-3 Cups of Milk
-1 Package of Oreos
Directions:
 1. Mix together Cool Whip, pudding, and milk until creamy.
 2. Crush up 2 rows of the Oreos. If you have one of these bad boys, then you life will be so much easier. If you do not, do not fret. You can just use whatever method you prefer to get them all crushed up. 

Valentine's Cake Pop Tag/Cupcake Topper Printable

Tomorrow is the first day of February! Crazy, I know! It's amazing how these months just keep on ticking by! I wanted to bring something in to L's school for all his teacher's to enjoy for Valentine's Day and I didn't want it to be to over the top in the calories department, but I also wanted it to be sweet and yummy. Did you know that marshmallows are only 25 calories each? Hmm. Well, decorated, hand-dipped marshmallows was what I settled on. I created a pop tag to go with it and you can get the FREE printable below. :D


Click on the image above to download


Christmas Candy Cane Centerpiece - {Tutorial}

Today, I'm going to do a super easy tutorial on how to make a very awesome centerpiece for your table. Actually, it could really go anywhere,... it's just so purdy. Okay let's get started:


What you'll need:
3 Boxes Candy Canes
1 Glass cylindrical vase
Alotta hot glue
Flowers to put in your vase
Red ribbon
1 Spearmint

1. Wipe off your glass vase. (If yours is anything like mine was, it has dust all over it.)

2. Unwrap your candy canes and carefully position the first one on the vase and determine how tall you would like it. I cut about a 1/4 inch off the bottom of most of mine. Make sure you put each candy can up to the glass before you glue it down, to see if it needs to be trimmed. Candy canes are not identical, like I thought they were. Some are shorter than others.


3. Continue to go around the vase, gluing as you go.

Marshmallow Reindeer Pops - {Tutorial}


What you'll need:
8 Jumbo (or large) marshmallows
8 Pops Sticks
Melting Chocolate
8 Red M&M's 
16 Candy eyes
16 pretzels
Wax Paper Lined Cookie Sheets


1. Insert stick in to the side of each marshmallow.


2. Lay two pretzels next to each other in the shape of reindeer antlers on the wax paper.


3. Melt the chocolate as directed on the package.

The Best of: Crazy Cute Party #26

This last week's link party was out of control! The links just kept coming and coming and coming! Every week, I am blown away by all you talented people out there! Ya,... I'm talking about you! Super talented person you are!

Let's take a peek (probably more like a long stare, though) at some of the most popular links from last week!

Make Your Own Camera Bag @ The Train to Crazy


DIY Key Display @ The Feral Turtle

Thrifty to Nifty Candelabra @ Maiden D'Shade

Plaque Attack @ Just Another Hang Up

Fairy Ballerina Party @ House of Smith's

My Craft Room @ Shabby Love

William Sonoma Fall Wreath Knock Off @ Cup of Delight

Thanksgiving Printables @ Blooming Homestead

All The Leaves Are Brown @ Kathe With an E

Christmas Tree Skirt Tutorial @ The Tanners

Weren't those just awesome! I think so, too! 

A great big "THANKS" to everyone that linked up last week and I hope you'll do so again this week! If you were featured today, please grab a button from my sidebar. I love seeing them around blog land. It makes my heart sing.

Oktoberfest Group Date - {Tutorial}


Hi everyone! I'm Mackenzie from Friday Night Date Night and am SO EXCITED to be here on 
Between U & Me! Thanks Courtney for this opportunity!

I blog about dating your spouse. Since Hubby and I are still in school, we have a very limited budget. Especially for extras like dates. This being the case, we are determined to have date night once a week even if its at home and with little to no cash. I am going to share some tips on how to have a fun group date on a a budget. 

Hubby was born and raised in Germany. So, back in October we decided to have an Oktoberfest party.

We had so much fun getting ready for this! I sent out invitations, made costumes, and prepared some really fun games. 


1. Instead of buying invitations, I made my own. I simply googled Oktoberfest images, found one I liked, and created an invitation on Word. Done and Done. Not to mention free.

Cool Stuff - 14 Amazing Party Ideas {1}

I am thoroughly enjoying the cool off here in Southern California. Last night, the Mr. and I got all cozy on the couch and turned our (fake) fireplace on. We drank hot chocolate, watched football, and I burned my "Autumn" candle! It was pretty awesome! 


It has been hard for me not to notice all the awesome parties y'all are throwin' together out there, so I thought I would put together a collection! So, here is my first installment of "Amazing Party Ideas!"


Turkey Favor Tins - {Tutorial}


Hi everyone, I'm Angie and I'm so excited to be a guest poster here at Between U & Me! Thanks so much, Courtney, for inviting me.

I blog over at Burton Avenue where I love to share simple and inexpensive craft projects. I especially love all things vinyl! I have been blogging almost 4 years, but never really liked sharing craft projects on our family blog. So, earlier this year, Burton Avenue began.

I have been married for 10 years and we have 6 cute little kiddies (9 years and under). They keep me busy! I love blogging because it gives me a chance to take a break from the day to day tasks of being a mom. I also love that it keeps my mind busy and gives me such great motivation.

Since Thanksgiving will be here soon, I want to share a project that is perfect for the big day. I remember when I was little, my mom would always help me make a cute favor to put on the table by each plate. I still enjoy making favors for everyone and here is what I will be making this year-Turkey Favor Tins.


Here is what you'll need to make them:
Card stock (I used 8 different colors)
Googly Eyes
Foam Sticky Tabs
Favor Tins (I got mine at Michaels in the wedding section)
Glue
Distress Ink

First, you'll need to cut out all the pieces. I used my digital cutter, but most of the shapes are pretty simple and can be cut by hand (there's a printable template at the bottom).

The Best of: Crazy Cute Party #25

Okay, y'all are really giving a girl a tough job sorting through these amazing links! I LOVE it!! Keep em' coming! :D


Take a look at some of the awesome links that were shared last week!


Bat Cake Topper @ Uncommon

Homemade Shutters @ Shabby Love

Jeweled Pumpkin @ Suzy's Artsy-Craftsy Sitcom

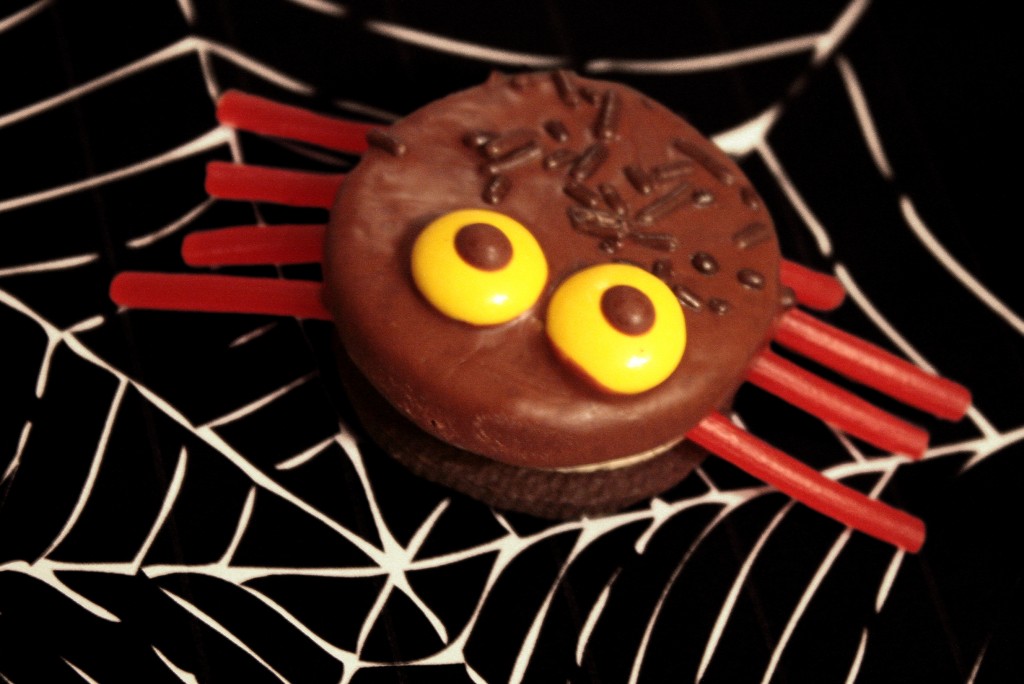
Oreo Cookie Spiders @ Craft Buds

How to Make a Love Boat Out of a Milk Carton - {Tutorial}

Well, Valentine's Day is rapidly approaching and did we get out the Valentine's decorations? -- wait,.. do I even have Valentine's decorations? I dunno,... but, they didn't come out to play this year. I think I'm still soaking in the plain-ness that is my home after all the Christmas decorations came down. Ya' know? I did see an awesome Valentine's project in one of the many magazine's that make a monthly (or weekly) trip to our house and I just couldn't resist. It's so simple and I knew my big kiddo would absolutely adore it.  He's a total boy, so anything plane, train, or automobile (or boat) is a winner. So, today Mommy was "the best Mommy, ever!" I kid you not, he actually said that to me when I got done with this thing and showed it to him. He was a little bummed out to hear that he couldn't "play" with it and that it was only for keeping his Valentine's cards in, though.


Now, I can't for the life of me remember what magazine I saw this in, but here's how you start...

Take a milk carton and either, tape the spout closed or cut off the plastic spout or you can do what I did and just push it in.  Then, cut a piece of cardboard (like from a cereal box) at 3 3/4 x 10 inches.


Then, fold the cardboard in half and tape to the milk carton as shown below...


Then, I covered the top and bottom with paper first, and then covered the sides with white paper. With an exact-o knife, cut a square out of the back for your pretty Valentine's Day cards. Then, go to town decorating it however you like and add some smoke stacks at the top by cutting three pieces of black paper at 2 1/2 x 5 inches. Then, roll them up and tape or glue them together. I used my hot glue gun for the entire project, but double sided tape would work just fine, too.  I also used a circle punch and a heart punch to make the cute little windows on the sides


And there it is! A little LOVE BOAT to store all the sweet Valentine's cards coming your way! Happy Valentine's Day everyone! XOXO

Click HERE to check out where I'm linking to and don't forget to join in on the fun!